A driveway gate touches several parts of a new-home project: site layout, grading, paving, electrical, access control, landscaping, and sometimes permitting. If those decisions aren’t coordinated early, the gate can become a source of unnecessary rework late in the project.
This builder’s checklist covers the major items to confirm before fabrication and installation, including gate location and configuration, finished grades, electrical and conduit, access controls, site readiness, and contractor responsibilities.
The goal is simple: make the gate part of the construction plan instead of solving for it at the end.
What Is a Driveway Gate Installation Checklist?
A driveway gate installation checklist helps the builder, gate contractor, electrician, and other trades coordinate the conditions that affect the gate before fabrication and installation.
For new construction, that means confirming more than the gate opening itself. Finished grades, paving, operator location, electrical service, conduit, access controls, landscaping, and site access can all affect the final installation.
Resolving those items early gives the gate contractor accurate information to design around and reduces the likelihood of changes after fabrication has started.
Step 1: Confirm Gate Location and Site Conditions
Confirm the proposed gate location, driveway opening, finished grades, approach, and surrounding conditions before the gate is designed.
Slope and elevation changes are particularly important. Changes in grade can affect gate clearance, configuration, direction of operation, and potentially the gate location itself. Available space can also affect whether a single-swing, double-swing, or sliding configuration makes the most sense.
Builders should also consider vehicle stacking and how the gate location interacts with the street, driveway approach, landscaping, walls, columns, and other site improvements.
If paving or grading is still underway, provide the gate contractor with the planned finished conditions—not just what exists on the site today.
For a broader look at sequencing these decisions, see our guide to planning a driveway gate during new home construction.
Step 2: Choose the Gate Configuration
Gate configuration should be selected based on the driveway opening, available operating space, grade, surrounding improvements, and how vehicles will approach the gate.
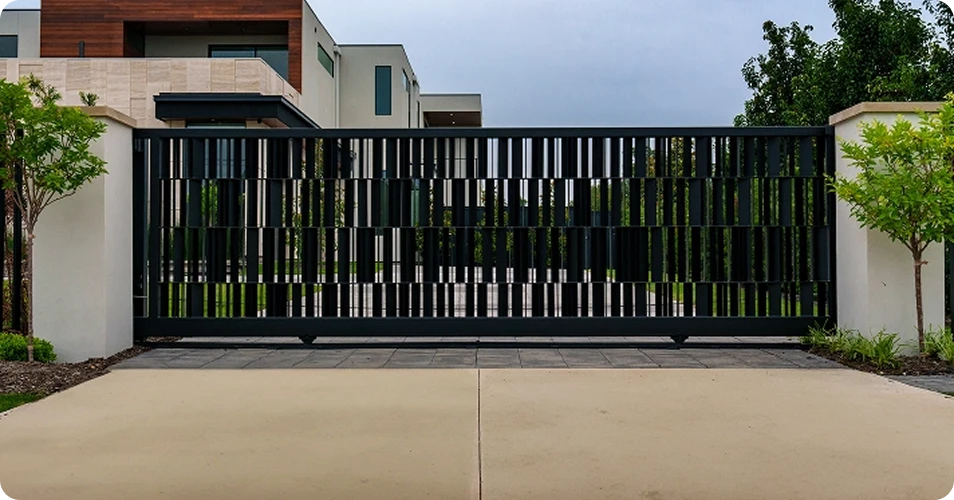
Single-swing gates require sufficient room for the full gate leaf to travel through its swing. Double-swing gates divide the opening between two leaves and can reduce the space required for each leaf. Sliding gates move laterally rather than into the driveway, but require adequate space alongside the opening and have their own site and foundation requirements.
The configuration should be established before surrounding work is finalized because it affects post locations, clearances, operator placement, electrical and conduit planning, and potentially adjacent landscaping or hardscape.
Step 3: Coordinate Finished Grades, Paving and Posts
Finished grade should be established before final gate dimensions and clearances are confirmed. Changes to driveway elevation, paving thickness, drainage, or adjacent hardscape can affect how the finished gate sits and moves.
Post locations also need to be coordinated with the final gate configuration and surrounding construction. Columns, walls, curbs, landscaping, utilities, and other improvements can affect where gate posts and operator equipment can be installed.
Ideally, the builder and gate contractor should coordinate these conditions before paving and finished landscaping are completed. If site conditions will change between measurement and installation, those changes should be communicated before fabrication begins.
Step 4: Plan Electrical and Conduit Before Paving
Automated driveway gates require electrical and conduit planning before paving and other finished work is completed. The gate configuration and operator location should be established first so the builder and licensed electrician know where the necessary infrastructure needs to terminate.
Depending on the system, infrastructure may be needed for the gate operator, safety devices, keypads, intercoms, cameras, vehicle detection, and other access-control equipment. The licensed electrician should determine the appropriate electrical service, wiring, conduit, and applicable permitting requirements.
On new construction, coordinating this work early can avoid unnecessary trenching, boring, saw-cutting, or other rework after the driveway is finished.
For more detail, see our guide to planning electrical and conduit for an automated driveway gate.
Step 5: Define Automation and Access Control
Automation and access-control requirements should be identified before fabrication and electrical infrastructure are finalized.
Start by determining how the property owner expects to use the gate. That may include remote controls, keypads, vehicle detection, cameras, intercoms, smartphone access, or integration with a broader access-control system. The selected equipment can affect operator requirements, conduit, wiring, equipment locations, and other parts of the gate system.
Safety devices also need to be considered as part of the automated gate design rather than added at the end. Lambert’s can evaluate the gate configuration, expected use, and access-control requirements and recommend an appropriate operator and safety system.
For the power source, Lambert’s generally recommends hardwired electric when reliable electrical service can reasonably be provided, with solar serving as a useful alternative when bringing power to the gate is impractical.
Automated gate systems should also be designed with the appropriate safety and entrapment-protection devices in accordance with applicable standards, including UL 325.¹
Step 6: Confirm Permitting and Contractor Responsibilities
Permitting requirements vary by municipality and project scope, so responsibility should be established before work begins. Depending on the project, requirements may apply to the gate location, electrical work, access control, or other portions of the installation.
Just as important, the builder should establish who is responsible for each part of the project. That may include gate design and fabrication, electrical service and conduit, trenching, concrete or masonry, access-control infrastructure, permitting, and final installation.
Lambert’s can identify the requirements within the gate system and provide drawings or project information when needed. Electrical work and applicable electrical permitting within that scope should be handled by a properly licensed electrical contractor.²
Clarifying these responsibilities early helps prevent scope gaps and last-minute delays.
Lambert’s coordinates the required 811 locate for excavation within our scope. Builders should also identify and communicate known private utilities, irrigation, drainage, or other privately installed lines near the gate area, as some private lines may not be identified through the standard 811 process.³
Step 7: Confirm Site Readiness Before Installation
Before the installation date, confirm that the site conditions Lambert’s designed and measured around are still accurate and that the installation area is accessible to the crew.
Verify that required paving, finished grades, columns, walls, electrical service, conduit, and other prerequisite work within the builder’s scope have been completed as agreed. For automated gates, electrical service and conduit should be ready when required before the operator installation is scheduled. The installation area should also be clear of materials, equipment, or other trades that would prevent the crew from safely performing the work.
If grades, dimensions, paving, landscaping, utilities, or other site conditions have changed since field measurements were taken, notify Lambert’s before installation. Changes to the site can affect gate clearance, post locations, operator placement, and installation requirements.
A final readiness check before the crew is dispatched helps prevent avoidable delays, return trips, and rescheduling.
Working through a driveway gate installation checklist early gives the gate contractor accurate information to design around and reduces the likelihood of changes after fabrication has started.
Builder Tip: If site conditions change after Lambert’s takes field measurements, let us know before fabrication or installation rather than waiting until the crew arrives.
The Checklist at a Glance
- Confirm gate location, driveway opening, approach, and finished grades.
- Select the gate configuration based on the site and operating space.
- Coordinate paving, grading, posts, columns, walls, and surrounding improvements.
- Plan electrical service and conduit before paving.
- Define automation, access control, and safety requirements.
- Confirm permitting requirements and contractor responsibilities.
- Verify site readiness before installation.
- Communicate any changes in field conditions before fabrication or installation.
A successful driveway gate installation starts well before installation day. When the builder, gate contractor, electrician, and other trades coordinate the gate early, the project is less likely to encounter avoidable changes or delays as construction progresses.
Lambert’s Ironworks works with builders and homeowners throughout Dallas-Fort Worth to plan custom driveway gates around the property, construction sequence, automation requirements, and finished site conditions. The earlier we’re involved, the more we can help identify potential conflicts before they become expensive changes.
Frequently Asked Questions
At what point in the construction sequence should a gate contractor be engaged?
Ideally, the gate contractor should be involved before final grading, paving, electrical, and landscaping decisions are completed. Early coordination allows the gate location, configuration, post locations, operator placement, electrical requirements, and access controls to be considered before surrounding work limits the available options.
What needs to be completed before driveway gate installation?
Site requirements vary by project, but agreed-upon grading, paving, columns or walls, electrical service, conduit, and other prerequisite work should be completed before installation when they affect the gate. The installation area should also be accessible and consistent with the conditions used to design and measure the gate.
What happens if site conditions change after the gate is measured?
Notify the gate contractor as early as possible. Changes to finished grade, driveway dimensions, columns, walls, paving, landscaping, or other site conditions can affect gate clearances, post locations, operator placement, and installation. Identifying changes before fabrication or installation can help avoid unnecessary rework and delays.
Who is responsible for electrical work for an automated driveway gate?
Lambert’s can identify the operator location and the power and access-control requirements for the gate system. A properly licensed electrical contractor should handle the electrical work and applicable electrical permitting within their scope. Responsibilities should be coordinated before paving and other finished work is completed.
How much maintenance does a driveway gate need after installation?
Iron and steel gates hold up well with basic care, including periodic cleaning, hinge lubrication, and prompt attention to paint damage. Our iron gate maintenance guide covers ongoing maintenance in more detail.
Can Lambert's coordinate driveway gates with builders and other trades?
Yes. Lambert’s works with builders, homeowners, electricians, and other project stakeholders to identify gate requirements and coordinate the information needed for installation. Early involvement is especially helpful when gate placement, finished grades, paving, electrical, conduit, access control, or surrounding improvements are still being planned.